Sublime text 3 is a simple and very effective text editor compared to Adobe dream weaver or notepad++, so I recommended using Sublime text editor. In this editor, I never face any kind of lagging and frizzing problem and the main advantage of this editor is- it has too many plugins with a package controller. So try it. It is also available for 30 days trial version.
Sublime Text 3 Package Control and Plugins Setup

How to Install Sublime Text 3:
Step 1: First of all download the sublime text 3.
Step 2: Than Install Sublime text 3 and enter your license key to activate your sublime text editor 3.
Step 3: All Things are done! Now open it.
Install Sublime Package Control:
Step 1: First go to Google and search for “Sublime Text Package Control”.
Step 2: You can see the title written as “Package Control: the Sublime Text Package Manager”. Click on that.
Step 3: On the top right corner, you can see the button “Install now”. Click on that button.
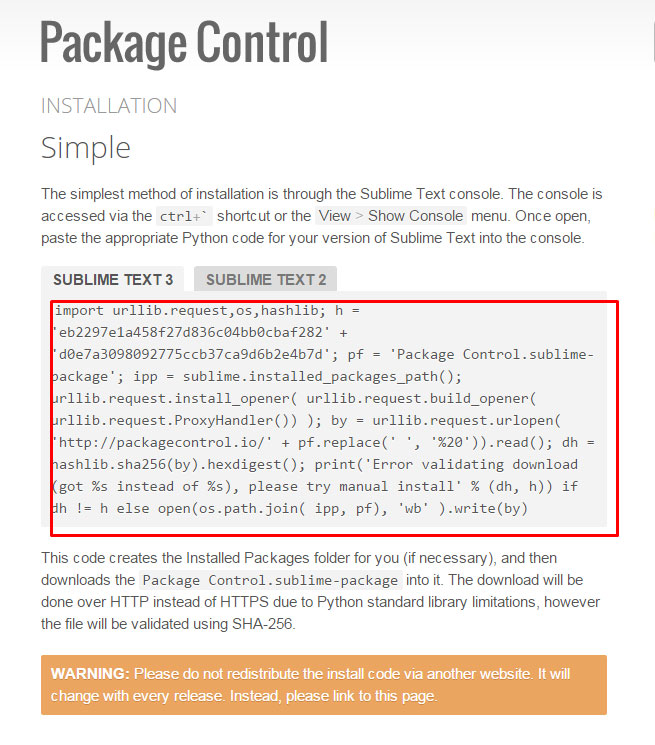
Step 4: On the left side of the page there are two options. First is Sublime Text 3 and the second is Sublime Text 2. You had to select Sublime Text 3.
Step 5: Then, copy the code and open Sublime Text 3.
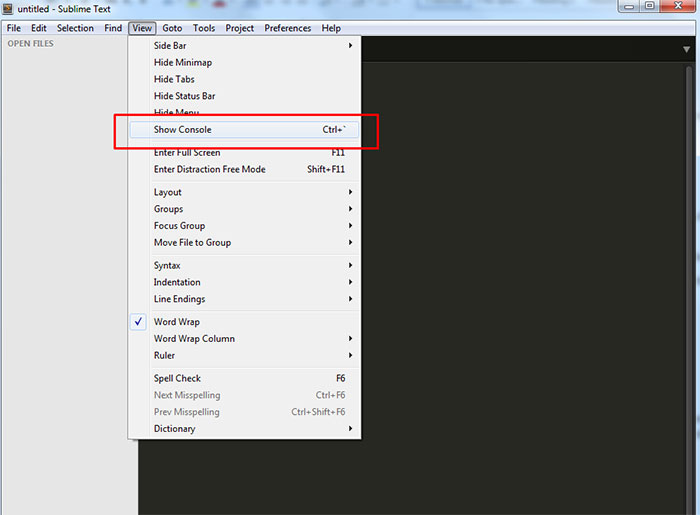
Step 6: In the top menu, go to view and click on “Show Console”.
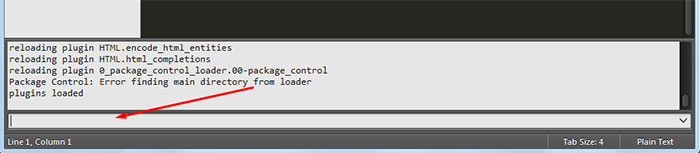
Step 7: Paste the code into the bottom bar and hit enter and wait for that finish.
Step 8: When it is finished, don’t forget to restart Sublime Text 3.
To test whether it is working or not, press Ctrl+Shift+P and type “install” and if the command is written as “Package Control: Install Package that means that we successfully install the package control.

Install Plugin and Features:
1.) Color Scheme:
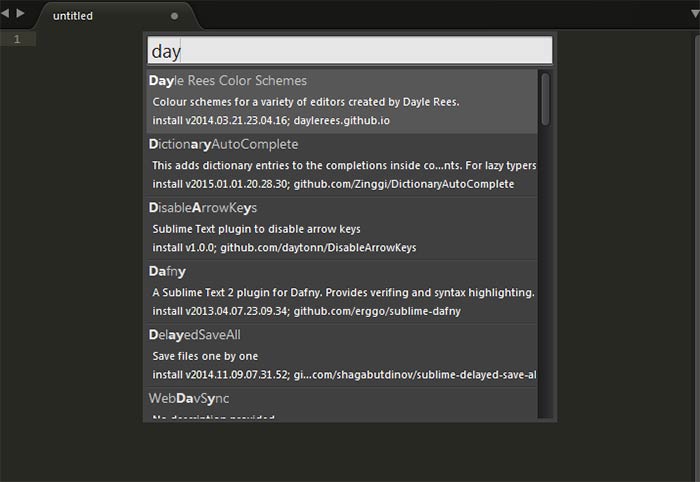
Step 1: press Ctrl+Shift+P and type “install” and hit enter.
Step 2: Search “Dayle” and you can see the Package “Dayle Rees Color Schemes”. Click that command to install the package. You can see in the bottom left, it will say Installing Package.
Step 3: After installing the package. Go to Sublime Text on the top and go to Preferences, color Scheme and go to Dayle Rees Color Schemes and we can see all the Color schemes.

2.) Predawn:
Step 1: Again press Ctrl+Shift+P and type “Install” and hit enter.
Step 2: Search “Predawn” and click on “Predawn” Package.
Step 3: the pop-up comes with a ReadMe file. It says that “To activate the theme, add or replay the current theme setting with the below code.
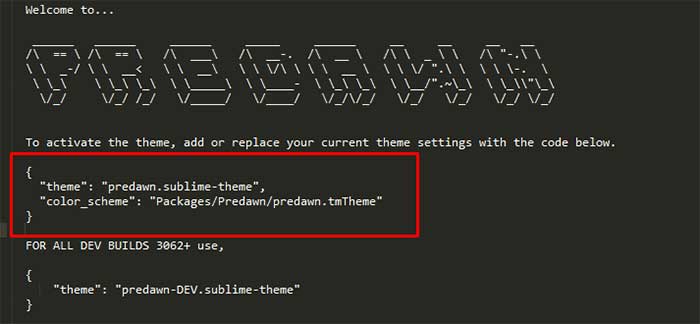
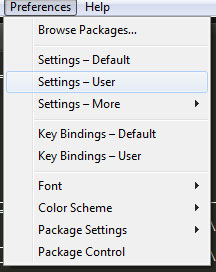
Step 4: Copy the below code and go to Sublime Text and then go to Preferences and go to Settings – User and erase all the coding for that.
Step 5: Paste the code that we copy from the ReadMe file and save the settings. You can see the changes.
Step 6: Go to that ReadMe file. Below it is written as “Also, some other settings that I like.”
Step 7: Below, copy all the coding and go to user settings again and paste it there and save the configuration.
Step 8: In the ReadMe file, you can see an important message “Make sure to restart sublime after installing”. So restart the Sublime Text 3.
3.) Bracket Highlighter:
Step 1: Press Ctrl+Shift+P and type “Install” and hit enter.
Step 2: Search “Bracket Highlighter” and click on the Bracket Highlighter package to install.
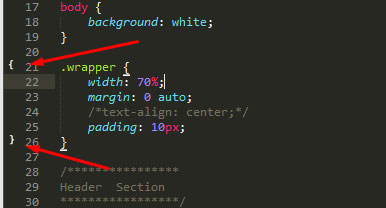
Step 3: And click on any bracket and it will tell you where that bracket starts and where it will end. It will also work in your CSS and HTML files.
4.) Sidebar Enhancements:
Step 1: Press Ctrl+Shift+P and type “install” and hit enter.
Step 2: Search “Sidebar Enhancements” and click on the Sidebar Enhancements package. To install.
Step 3: right click on any folder in the Sidebar and you can see that there is a lot of options are added.
[yellowbox]Note: we are using the same steps again and again so “Ctrl+Shift+P” opens the sublime command palette and after typing “install” it opens the package control manager. So when you want to install any plugin. you want to do the same thing every time and in the package manager, you need to type the plugin name.[/yellowbox]
5.) Sublime Code Intel:
Step 1: Press Ctrl+P and type “install” and hit enter.
Step 2: Search “Sublime Code Intel” and click on Sublime Code Intel to install that package. This one takes a second to install.
Step 3: And again the Popup ReadMe file will open, and it will only give you the information.
Step 4: for testing, open a sheet and, for example, wrote testing and when I hit the dot, the popup will come up with the various method that I can use.
6.) Emmet:
Step 1: Press Ctrl+Shift+P and type “install” and hit enter.
Step 2: Search “Emmet” and click on the Emmet package to install.
Step 3: Again the ReadMe file will come up. It will only give you the information.
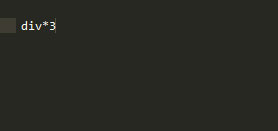
Step 4: for example, if I open my HTML file and I want Three <div>. So I can write div*3 and hit Tab, and it will come out with three <div>.

7.) Sublime Linter:
Firstly, we had to go to node.js.org. Download and install Node Package Manager.
Step 1: After installing Node Package Manger, press Ctrl+Shift+P and type “install” and hit enter.
Step 2: Search “Sublime Linter’ and click Sublime Linter package to install. Once it will install. It doesn’t do anything itself, we have to install each language separately.
8.) SublimeLinter JsHint:
Step 1: Go to Google and search SublimeLinter JsHint and click on the top link.
Step 2: Go down to the installation instruction. Read the instruction and copy the code.
Step 3: Open up your Terminal and paste that code to install JsHint. If you get an error, you may need to do “sudo” before the command.

Step 4: To install JsHint Package, open Sublime Text 3 and press Ctrl+Shift+P and type “install” and hit enter.
Step 5: Search “SublimeLinter – JsHint” and click on SublimeLinter – JsHint to install the package. Restart Sublime Text 3 after installation.
Step 6: Now we go to our JavaScript File and see if its works or not.
Step 7: Select any coding and see on the bottom, it will tell you what the problem is, for example, errors, Missing semicolons, etc.
8.) SublimeLinter CssLint:
Step 1: Go to Google and Search SublimeLinter CssLint and click on the top click in Google.
Step 2: Go down to the Linter Installation instruction.
Step 3: Read all the instructions and copy the code.
Step 4: Go back to the terminal(CMD) and do “sudo” paste the code and install.
Step 5: Open Sublime Text 3 and press Ctrl+Shift+P and type “install” and hit enter.
Step 6: Search SublimeLinter – csslint and click on SublimeLinter – csslint to install the package. Restart Sublime Text 3 again.
Step 7: Open your CSS Script and select any coding. At the bottom, it will tell you what the problem in the script is.
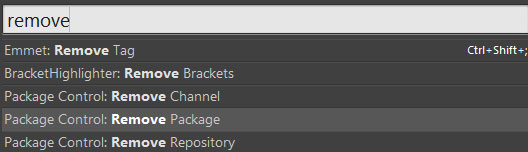
If you want to remove the message. Press Ctrl+Shift+P and type “remove” instead of “install” and hit enter. It will show you all the packages that you have installed. Click on any package to remove.
Final Words!
In sublime text 3, you got lots of plugins and features but I mention the best plugin which I use for my daily developing project and it helps me a lot. After using sublime text my programming speed improved and you don’t need to enter a single line continually and you can edit multiple lines at one time 🙂
So I hope you enjoy my tutorial or if you like this please share this with your friends and if you have any questions then comment below.